Main Menu - Ribbon User Interface
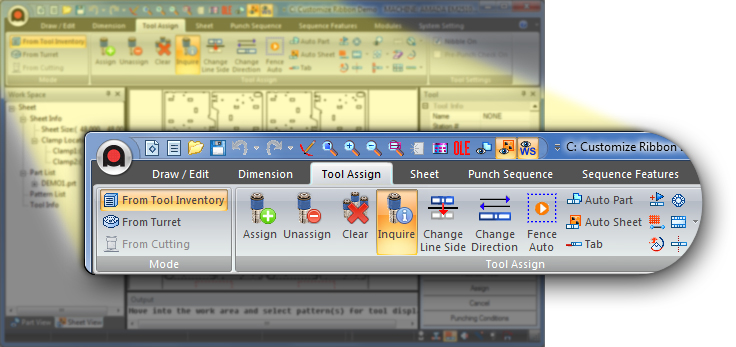
The Ribbon interface is very useful in that all possible options (in a selected tab) are displayed at one time. Users will be able to see other possible ways for completing tasks that can speed up the CADCAM process.
AP100US Main Menu Quick Access Toolbar Toggle Toolbar
Users may customize the Ribbon Interface by changing icon style and placement.
Note: The Ribbon interface is now the only option when doing a new installation. Older CADCAM interfaces are no longer being supported; for this reason Amada recommends that the user switch to the Ribbon UI. Outdated Classic and Modern interfaces can still be run by clicking the corresponding .exe file in the installed folder.
|
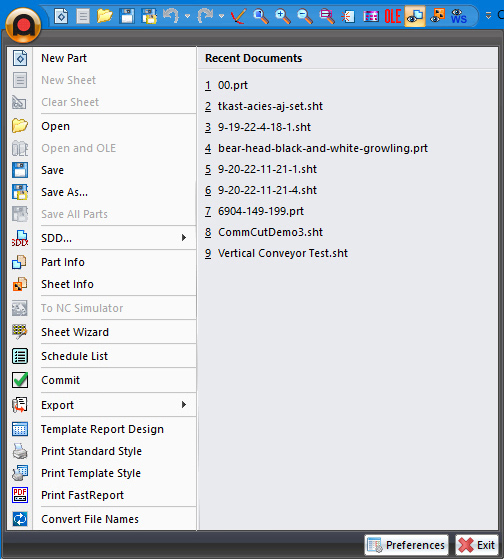
The
basic AP100US
functions and options menu can be accessed by clicking the Amada
|
|
|
||
Option |
Description |
|
Create a new part file.
|
||
Create a new sheet file.
|
||
This option quickly deletes all parts and patterns from a sheet, while keeping currently active machine/tool inventory files.
|
||
Open an existing file. Input and changes to information is allowed.
|
||
|
|
Open an existing OLE file. Input and changes to information is allowed. |
|
Save the changes made to an open file. The system prompts you to verify the file name and path.
|
||
|
|
Save new files that you have not yet named, or assign a new file name to modified files, thus preserving the contents of the original files.
|
|
| Save All Parts | Click Save All Parts to save all the parts on the sheet at one time with their current file names. Note: Enabled in Sheet View only.
|
|
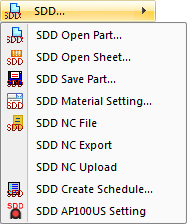 |
Open the SDD flyout menu for a list of SDD options.
|
|
| Part Info | Gives detailed information about the part.
|
|
| Sheet Info | Gives detailed information about the sheet.
|
|
| To NC Simulator | Generate NC Code and save sheet to simulate in FabriSIM.
|
|
| Sheet Wizard | With this option the user may prepare sheet(s) for nesting and generate NC Code.
|
|
Click to open
the Schedule List to monitor material usage and job status for
jobs that are being processed (or have already been processed)
by machines on the factory floor. |
||
To
push a fully prepared job to the Schedule List click the Commit button. |
||
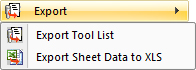 |
The Export flyout menu displays options for exporting various file types.
|
|
| Template Report Design | This option will open the Template Report File and Export Tools window. This application allows you to generate manufacturing reports and to design custom reports.
|
|
| Print Standard Style | Select Print Standard Style to define the printing or plotting options.
|
|
| Print Template Style | Selecting the Print Template Style command opens the Printing Options dialog box where the user can select a printing template.
|
|
| Print FastReport | This option generates a pdf using the FastReport module.
|
|
| Convert File Names | The Convert File Names option opens a utility that translates files created in earlier versions of the software.
|
|
Click to open the AP100US Preferences window.
|
||
Click to close the AP100US program. The program will prompt the user to save the sheet, if any changes have been made. |
||

The Ribbon interface also includes a tool bar at the top left, which allows the user to easily select common options and functions. For more info see Quick Access Toolbar Options.
|
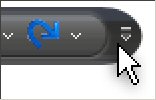
On the Quick Access Toolbar, click the drop-down arrow to open the customize toolbar flyout shown below - |
|||
|
|
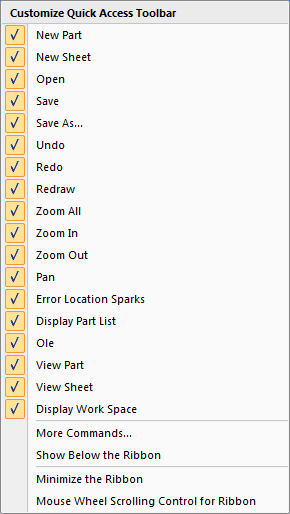
The most commonly used options are already checked on by default as shown here. Add or remove options on the toolbar by toggling the checkbox for an icon, or by right-clicking on an icon on the Toolbar itself and selecting Remove from Quick Access Toolbar.
After either action the icon will be unchecked in the toolbar flyout. Re-check it at any time. See Customize Ribbon UI for more info. The system will remember changes made by the user, which will be available for every AP100US session until manually changed.
To scroll through ribbon tabs from left to right to left, enable Mouse Wheel Scrolling Control for Ribbon. |
||
|
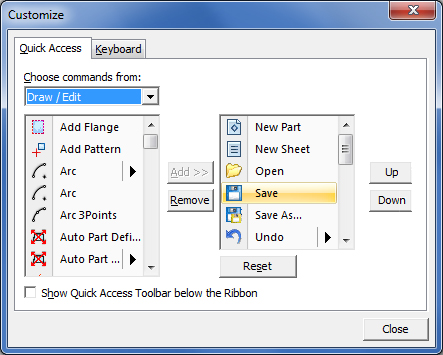
Select More Commands to find additional icons to add to the Quick Access Toolbar. (The menu Ribbons cannot be altered.)
Select an icon and move it left-right-left by clicking the Up and Down buttons as needed to control it's placement on the Quick Access Toolbar.
The Keyboard tab allows new keyboard shortcuts to be set.
|
|||
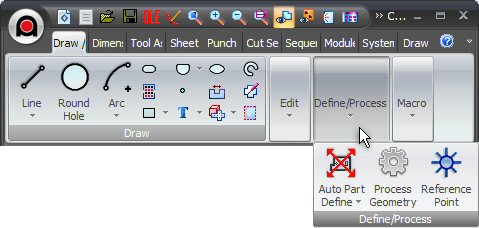
Click Show Below the Ribbon (or check the Show Quick Access Toolbar below the Ribbon checkbox) to display the toolbar below the ribbon menus. Minimize the Ribbon hides the ribbon and shows only standard menu tabs -
Click a menu item to display the entire menu for that tab. |
||||
Reducing the Size of the AP100US UI
When the user reduces the size of the AP100US interface by dragging the corners or edges, the ribbon will appear compressed as shown here -
All of the same options are still available, but much of the text and icons are now hidden. When the cursor is over the ribbon menu, roll the center mouse button to scroll through the menu items.
Useful options can be toggled on or off by clicking an icon in the Toggle Toolbar, which is located at the lower right-hand side, below the work area. Multiple options can be enabled simultaneously.

See Toggle Toolbar Options for more info.

 in the upper left corner of the interface.